You are using an out of date browser. It may not display this or other websites correctly.
You should upgrade or use an alternative browser.
You should upgrade or use an alternative browser.
Rod Building The Rod Building Thread
- Thread starter Divad
- Start date
As long as those were sitting, I've come to the conclusion that rod building just isn't my thing. I do appreciate your help in getting me started so that Phil can finish....lolJust tell him to wrap it himself
Last edited:
Does anybody have a simple technique for wrapping the dreaded tip.? This 3# I'm building has the thinnest tip area and I'm struggling.
flybill
Life of the Party
The tip is always hard, if you can move your support up closer to the tip it helps. Get the wrap started and push it gentley into place and wrap towards the tip. Might take a few tries. Remember, just the tip! LOL! You can do it!Does anybody have a simple technique for wrapping the dreaded tip.? This 3# I'm building has the thinnest tip area and I'm struggling.
Bambooflyguy
Life of the Party
The tip top wrap definitely sucks! Like Bill said, support as close as possible and since mine is usually a small wrap, I cut some thread and use a small wood clothes pin for tension. On some of my Hotrodz I don’t wrap the tip but put Threadmaster over the end of the tip top.
The tip top wrap definitely sucks! Like Bill said, support as close as possible and since mine is usually a small wrap, I cut some thread and use a small wood clothes pin for tension. On some of my Hotrodz I don’t wrap the tip but put Threadmaster over the end of the tip top.
It’s utter heresy, but I do a whip finish, like you’d do on a fly head. It makes it the easiest one of the lot. Of course, those of you who can only use a whip finish tool for that are SOL
Divad
Whitefish
Do you need to wrap the tip on a 3wt? I left my tip w/o epoxy on my 7wt build and have put some big fish to it. I also let it be on the 4wt Iconoglass in hopes to not add any weight to the tip. For heavier rods I can see it being beneficial and non impactful.
On the ultralight rod I built for my sister I did put a 10 turn wrap for looks. If you are using the CRB hand wrapper I wrap the tip just to the outside of the two supports, with the thread tracking slider halfway out of the groove.
On the ultralight rod I built for my sister I did put a 10 turn wrap for looks. If you are using the CRB hand wrapper I wrap the tip just to the outside of the two supports, with the thread tracking slider halfway out of the groove.
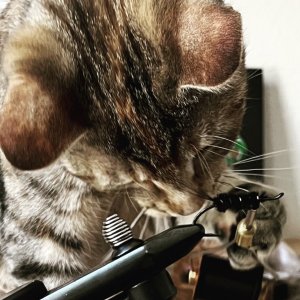
Ding, Ding, Ding, you win the prize. I actually put my thread spool in my fly tying bobbin, wrapped it up the tip and whip finished it. Easy, peasy and looks better than the others I've done in the past. Thanks...It’s utter heresy, but I do a whip finish, like you’d do on a fly head. It makes it the easiest one of the lot. Of course, those of you who can only use a whip finish tool for that are SOL
Ya, the tip I bought is maybe one size larger than perfect, so I had to make a little ramp for a transition.
Here's some of the thread work on my last of the Winter projects. This is a 7ft-3# glass rod. I used this barberpole pattern on all of the guides. It's not too difficult after you do a couple and is really just a trim band. The sawblade pattern is a little more difficult. I made several practice runs before I tried it for real. There's two challenges. Getting the sawblades to match is tough and getting the thread to lay down between the blades a challenge as the under thread wants to pinch up. I enjoy the learning process. I really like the pearl sparkle band.
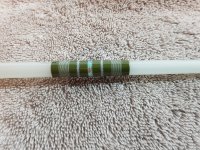
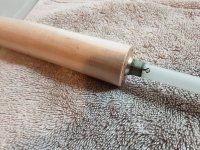
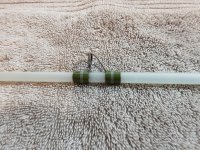


flybill
Life of the Party
Beautiful!Here's some of the thread work on my last of the Winter projects. This is a 7ft-3# glass rod. I used this barberpole pattern on all of the guides. It's not too difficult after you do a couple and is really just a trim band. The sawblade pattern is a little more difficult. I made several practice runs before I tried it for real. There's two challenges. Getting the sawblades to match is tough and getting the thread to lay down between the blades a challenge as the under thread wants to pinch up. I enjoy the learning process. I really like the pearl sparkle band.
View attachment 98663View attachment 98664View attachment 98662
Bambooflyguy
Life of the Party
I know my eyes are getting older but what bubbles?? Looks good to me Phil…..and you can’t see them while fishing this rod…….
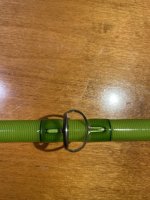
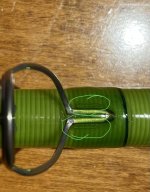
How do you avoid these air bubbles next to the guide feet?
View attachment 98668
Ya, looks good. Silk turns transparent so any bubbles are back-lit. I pour my resin out onto a foil lined plate and along with giving it a longer pot-life it causes the bubbles to disappear.
flybill
Life of the Party
You could do multiple coats of flex coat or whatever you're using. Start with a very thin first coat and get the epoxy to fill any gaps. Let it dry and then do a final coat. You can also use a heat gun, sparingly and get the bubble(s) out.How do you avoid these air bubbles next to the guide feet?
View attachment 98668
Just go slowly and make sure there aren't bubbles in the epoxy before you use it on the guides. I use a paper plate with foil on top to mix the epoxy. Give it a little time to settle and get any bubble out of it before you apply it to the rod.
Ahh, now I see those parallel gaps. I've read it's from too much tension on the silk thread not allowing enough resin to flow into the cavity. You really need to force the resin down and saturate the area on the 1st coat and use less thread tension.
Bambooflyguy
Life of the Party
Looked like reflections from the guide foot wraps……


