Porting this over from corporate.
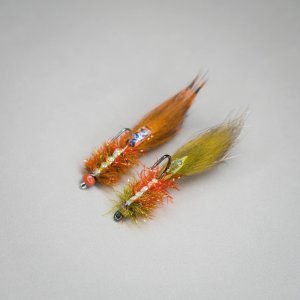
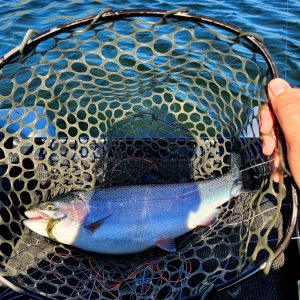
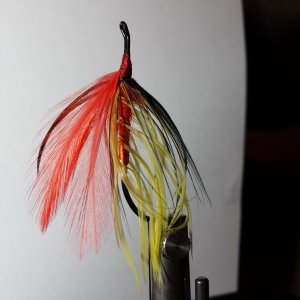
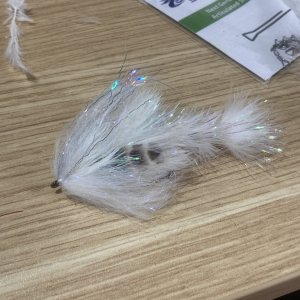
I've had several inquiries about the Wells Spoons that I use for Coho so I thought I'd put up a step by step on how I make them. Not being a fly I'm sure this won't be for everybody. These lures can be thrown with a fly rod and fly line, especially a spey rod which is what I like to use when casting them. I also troll these in the river or the salt with a full sinking line. Of course they can also be used with gear rods and is how I caught all my coho this year.
The history as I've heard it:
Earl Wells developed these for fishing kings in Jim Creek decades ago. I use to get these at Skagit Anglers where they were advertised as “Fly Rod Spoons” When he passed, they were made by others but not all of them were true to the original. I've tried to keep these true to what Earl made based on some of his originals that I have in my possession. The sizing and shapes that I use are of my own preference and how they behave in the water.
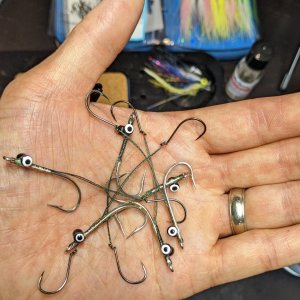
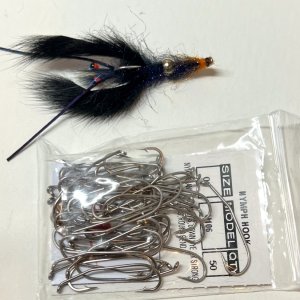
There is a process to making them so I usually make them in batches of six or seven and get the hooks bent and wire cut before starting.
Tools:
I don't have a wire forming tool and have never used one. For these what I use is a vise and a 5 penny box nail to form the wire around. I cinch the nail in the vise so that almost half of the body is out of the vise so I can twist the wire as close to the nail as possible.

The other specialized thing I use is a pair of 7 Inch French Shears for cutting the brass sheet. You'll also need a pair of side cutters that will cut as close to flush as possible and a couple pair of needle nose pliers. A tape measure, extra fine point sharpie, a straight edge, and a hole punch or drill will also be needed.

I start by marking out a 9/16” wide strip on the brass sheet. Some call this brass shim stock, I found this sheet somewhere online and it is gold on one side. I like it better after the gold is rubbed off with steel wool, but until then it makes a great marking surface. The thickness of the sheet is .016”

After cutting the strip with the french shears you need to gently tease it back to a flat surface from the coil it becomes after cutting. I then trace around my pattern leaving a little room between them to separate them before cutting them out. Handling them too much will rub off the marking so try to minimize that when you cut them out with the french shears. After cutting them out I usually go around the edges with a file to dress them up and remove any sharp edges that may cut your line.

The next step is to punch the holes. I use a hole punch that I've had from other projects but a friend of mine uses a center punch and a drill. The hole size I use is 3/32” because it's the smallest die for the tool. You want the edge of the hole about 1/8” from the edge of the brass. The guide on my tool was set to 1/4” so I had to modify the fence on it by bending a radius in it to get the hole closer to the edge.


After the holes are made it's time to put the wiggle in them. This can be done with a ball peen hammer or the head of a 3/8” carriage bolt. With either thing I use a small piece of cork sheeting under it so the brass can flex. Do one end and then flip it over and do the other end.


Next comes the wire. Stainless spring wire at .018 dia. The spring part is important in the description of what you buy. It needs to be fairly stiff and “springy” so it holds it's shape.

Start with a 6” length and holding each end with a pair of needle nose start the bend around the nail to form a loop and stop when it looks like this.

I've had several inquiries about the Wells Spoons that I use for Coho so I thought I'd put up a step by step on how I make them. Not being a fly I'm sure this won't be for everybody. These lures can be thrown with a fly rod and fly line, especially a spey rod which is what I like to use when casting them. I also troll these in the river or the salt with a full sinking line. Of course they can also be used with gear rods and is how I caught all my coho this year.
The history as I've heard it:
Earl Wells developed these for fishing kings in Jim Creek decades ago. I use to get these at Skagit Anglers where they were advertised as “Fly Rod Spoons” When he passed, they were made by others but not all of them were true to the original. I've tried to keep these true to what Earl made based on some of his originals that I have in my possession. The sizing and shapes that I use are of my own preference and how they behave in the water.
There is a process to making them so I usually make them in batches of six or seven and get the hooks bent and wire cut before starting.
Tools:
I don't have a wire forming tool and have never used one. For these what I use is a vise and a 5 penny box nail to form the wire around. I cinch the nail in the vise so that almost half of the body is out of the vise so I can twist the wire as close to the nail as possible.
The other specialized thing I use is a pair of 7 Inch French Shears for cutting the brass sheet. You'll also need a pair of side cutters that will cut as close to flush as possible and a couple pair of needle nose pliers. A tape measure, extra fine point sharpie, a straight edge, and a hole punch or drill will also be needed.
I start by marking out a 9/16” wide strip on the brass sheet. Some call this brass shim stock, I found this sheet somewhere online and it is gold on one side. I like it better after the gold is rubbed off with steel wool, but until then it makes a great marking surface. The thickness of the sheet is .016”
After cutting the strip with the french shears you need to gently tease it back to a flat surface from the coil it becomes after cutting. I then trace around my pattern leaving a little room between them to separate them before cutting them out. Handling them too much will rub off the marking so try to minimize that when you cut them out with the french shears. After cutting them out I usually go around the edges with a file to dress them up and remove any sharp edges that may cut your line.
The next step is to punch the holes. I use a hole punch that I've had from other projects but a friend of mine uses a center punch and a drill. The hole size I use is 3/32” because it's the smallest die for the tool. You want the edge of the hole about 1/8” from the edge of the brass. The guide on my tool was set to 1/4” so I had to modify the fence on it by bending a radius in it to get the hole closer to the edge.
After the holes are made it's time to put the wiggle in them. This can be done with a ball peen hammer or the head of a 3/8” carriage bolt. With either thing I use a small piece of cork sheeting under it so the brass can flex. Do one end and then flip it over and do the other end.
Next comes the wire. Stainless spring wire at .018 dia. The spring part is important in the description of what you buy. It needs to be fairly stiff and “springy” so it holds it's shape.
Start with a 6” length and holding each end with a pair of needle nose start the bend around the nail to form a loop and stop when it looks like this.